Swiss Meringue Buttercream Frosting
- Sarah Cohan
- Oct 25, 2016
- 6 min read
You know that silky smooth, decadent, not-cloyingly-sweet frosting that you get on fancy cakes and cupcakes from your local baker(y)? That’s traditional buttercream frosting, and it’s THE BEST.

There’s a few different kinds, so let’s review. When I say “traditional” buttercream, I’m talking Italian, Swiss, or French. They all involve incorporating eggs and sugar and butter in different amounts and methods, yielding slightly different but all entirely amazing results. “American” buttercream, however, is really just creaming butter and powdered sugar (sometimes with a little milk or cream), and it’s often way too saccharine sweet and gritty. Yes, really deep down we all love it, but there’s a time and place for it - it’s infrequently, and when you just can’t resist that leftover big-box supermarket cake sitting in your workplace kitchen.
So, when we say buttercream, we’re talking about these:
Italian Meringue Buttercream (IMBC)
This type involves cooking sugar & water into a syrup, whipping egg whites, and then very carefully and gradually pouring the hot sugar syrup into the whipping egg whites before adding butter. Swiss buttercream is similar (we’ll get to that below), and I really haven’t found much of a difference between them that would cause me to prefer to deal with streaming hot sugar syrup near my hands, so I don’t make this one too often.
French Buttercream
You’ll note this one doesn’t have the word “meringue” in the title. That’s because a meringue is made from solely egg whites, and French Buttercream is made from whole eggs and egg yolks. It has a much richer, almost custard-like flavor, and it’s INCREDIBLY decadent. Because of the egg yolks, though, it doesn’t take to color adjustments very well. Usually this one is best without additives (like caramel, chocolate, or peanut butter), but just with spices or extracts.
Swiss Meringue Buttercream (SMBC)
This is my favorite go-to frosting, and the recipe you’ll find here below. It’s infinitely adaptable, pretty easy to make, super shelf and freezer stable, and very impressive. Lots of people are overwhelmed by the description of how to make it, and the confusing visual things that happens during the process, so I’ve included some pictures and videos at the bottom to help you along.

Happy Baking!
MAKES ~6 cups of frosting, enough to fill, crumb coat and frost a 3-layer 8” cake, or to frost 24 cupcakes. To have additional frosting for piped cake decorations I would make this x 1.5. Leftovers will freeze well and keep for over a year!
INGREDIENTS/SUPPLIES
5 large egg whites (about 175g - each egg white is ~35g)*
1 and 2/3 cup sugar (310g)
pinch of salt
1/4 teaspoon cream of tartar
5 sticks unsalted butter, cut into tablespoons, room temperature**
1.5 teaspoons vanilla extract***
stand mixer with whisk attachment
small saucepan that will allow your mixer bowl to sit inside, but not touch the bottom
hand whisk
candy thermometer
*When you’re baking with egg yolks (lemon curd, ice cream, custard, etc.) it’s easy to save the egg whites for a later use - freeze them in an ice cube tray!
**If you’re making this last minute and your butter is cold, check out tip #7 here for quick room temperature butter. It’s really important that your butter isn’t cold, and also isn’t melty.
***If you’re making a vanilla buttercream then this is what you’d add, and you could even use the seeds of one vanilla bean in your sugar/egg white mixture before you start heating instead. If you don’t want your frosting to have a slight tan tint, make sure to use a clear vanilla, but not fake vanilla! See a picture of what I’m talking about at the bottom of the post. If you’re making an alternately flavored buttercream, you could use 1/2tsp of vanilla and then 1tsp of another extract (almond, coconut, etc.), or skip the other extract if you’re adding something like peanut butter, caramel, or chocolate.
DIRECTIONS
Place about an inch of water in your saucepan and bring it to a boil. Once boiling, lower heat to a simmer.
Add 175g egg whites (5), 310g sugar (1.66c), 1/4 tsp cream of tartar, and a pinch of salt to your stand mixer bowl, and hand whisk to combine.
Place the stand mixer bowl on the saucepan, so you’re creating a double boiler. Whisk vigorously by hand every two minutes or so, until the liquid reaches 185F on your candy thermometer, about 10-12 minutes.
Immediately place the bowl onto the stand mixer, and whisk on high until the mixture has turned glossy, and is not warm at all. This usually takes around 10-12 minutes. If you touch the outside of the bowl and it’s no longer warm, you can test the mixture with a clean fingertip to be sure. If you move on to the next step and it’s not fully cooled, you will not end up with frosting - you’ll end up with a soupy mess!
Once cool, reduce the speed to medium and begin to add your tablespoons of butter individually, with about 5 seconds in between each. When you’ve finished adding your third stick of butter, your mixture might look curdled and soupy - that’s normal! Watch the video below to see the magic happen as you add that fourth/fifth stick.
Once your mixture finally looks like frosting, add your vanilla, or whatever else you’d like! Use immediately or within a few hours. Can be refrigerated up to two weeks, and frozen up to a year or more (keep reading for how to use after the fridge/freezer).
Keep reading for some notes on troubleshooting, flavor ideas, and pictures & videos of the process...
Troubleshooting:
If your butter was too warm when you added it, it might stay a soupy mess after you’ve finished adding it all. Keep whisking on high for 3-4 minutes. If it never comes together, you can either refrigerate it for 5 minutes at a time and try whisking again, or hold some cold ice packs on the outside of the bowl while it whisks. Eventually you’ll get there!
If your butter was too cold when you added it, you might feel that the bowl is cold and your mixture will stay curdled looking and it won’t come together. Don’t fret! If you have a creme brûlée torch and are working with a metal mixing bowl, torch the outside of the bowl as the mixer is whisking - just be careful, and keep moving the torch rapidly in circles on the bowl, never hold it in one place. Eventually it will come together. If you don’t have a torch, try holding hot washcloths on the outside of the bowl, again, as the mixer is running. This is also what you might need to do when you’re using frosting that has come to room temp from the fridge or freezer - if it’s not cool enough when you start to mix you might have this issue.
Flavor Ideas:
Salted Caramel: make some (here’s my favorite recipe), and then add it a 1/4 cup at a time until you get the desired color/flavor.
Chocolate: reduce your butter by one stick (so use 4 sticks), and then add 11 ounces of melted (and cooled!) chocolate at the end.
Peanut butter: make sure it’s the “bad for you” kind and not “Natural”, and add it bit by bit to your heart’s content.
Mint: skip the vanilla extract, add 1tsp of mint extract instead, and some green (or pink) food coloring.
Play around! You can add almost anything as long as it’s not too liquidy, hot, or cold.
Pictures & Videos:
These are your main ingredients - 5 sticks of room temperature unsalted butter (sliced into tablespoons or smaller pieces; yes this picture is missing one), and 5 egg whites with 1 and 2/3 cups of sugar, 1/4 tsp cream of tartar, and a pinch of salt:

Here's what your egg white & sugar mixture should look like before and after heating to 185F (the before photo shows it in double boiler position):

Here's the speed your mixer should be on to whisk the 185F meringue mixture for 10-15 minutes, or until it's COMPLETELY cool:

This is what your meringue should look like once it's completely cool, and ready for butter!
And this is the speed at which you should whisk and start adding the butter pieces:

Here is what it will look like when you've added 3 of the 5 sticks of butter - like a weird, curdled, soupy mess right? Don't worry - it's supposed to look like this!
And this is where the magic happens - watch how it all comes together as you add that last stick of butter and keep whisking for a minute or so:
And voila! Beautiful vanilla swiss meringue buttercream frosting:


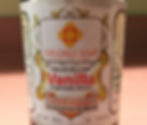
Oh - and here's the brand of clear vanilla that I use, straight from Mexico. Don't buy the fake stuff from the supermarket!!